
I. Product Overview
-
Application
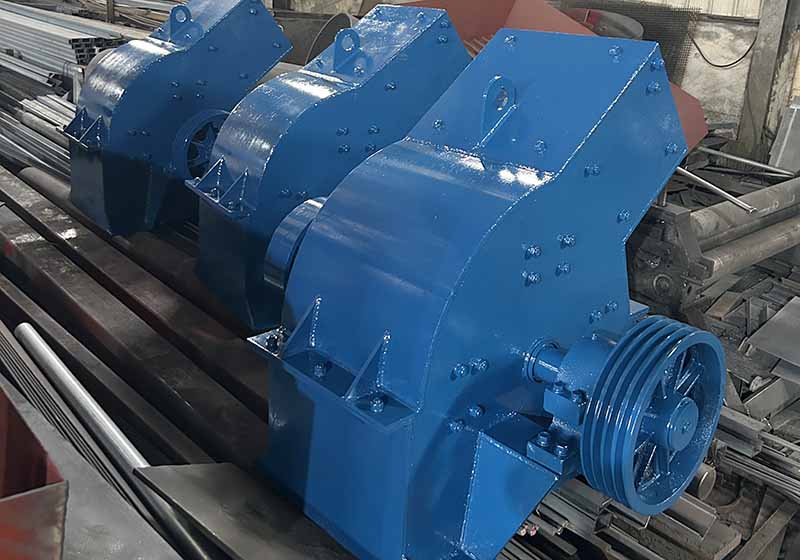
The hammer crusher is used for medium and fine crushing of brittle materials with medium hardness (such as limestone, coal, coke, and gypsum). It is suitable for industries including mining, cement, chemicals, power generation, and building materials. It is strictly prohibited to process wet, sticky, muddy, or metal-contaminated materials.
-
Structural Components
- – Rotor: Main shaft, discs, pins, and hammers (core wear parts).
- – Housing: Feed inlet, crushing chamber, liners, grating/screen plate (for particle size control), and discharge outlet.
- – Drive System: Motor, pulley, V-belt, and bearing housing.
- – Auxiliary Components: Inspection door, maintenance door, safety guard, and adjustment bolts.
-
Working Principle
The motor drives the rotor to rotate at high speed, and the hammer heads crush the material through impact, shearing, and grinding; qualified material (smaller than the screen openings) is discharged, while larger pieces are repeatedly crushed within the chamber until they meet the specifications.
-
Technical Specifications
| Model | Feeding size(mm) | Output size | Capacity(t/h) | Motor power(kw) |
| PC400*300 | ≤100 | ≤10 | 5-15 | 7.5 |
| PC600*400 | ≤150 | ≤15 | 10-25 | 15 |
| PC800*600 | ≤200 | ≤20 | 20-40 | 37 |
II. Installation and Commissioning
-
Installation
- – Foundation: A level concrete foundation; anchor bolts must be securely tightened; the machine body must be vertical with no tilt.
- – Leveling: The rotor must be level and rotate smoothly, with no binding or abnormal noises.
- – Drive: The motor and main unit pulleys must be aligned parallel to each other; the V-belt tension must be appropriate; protective covers must be complete and secure.
- – Electrical: Grounding must be reliable; insulation resistance must be ≥1 MΩ; no exposed wiring.
-
No-Load Test Run
- Inspection: All machine bolts must be tightened; the chamber must be free of debris; and lubrication must be adequate.
- Test Run: Verify rotation direction matches the markings; ensure inspection doors are closed and locked.
- Operation: Run continuously under no-load conditions for 2 hours; bearing temperature rise ≤40°C, maximum temperature ≤70°C; no oil leaks, abnormal noises, or vibrations.
-
Load Test
- – Start with a small feed rate, feeding uniformly, and gradually increase to the rated load; run for 1–2 hours.
- – Inspection: Ensure the output particle size meets specifications, and there is no material blockage; check that all bolts are tight and bearing temperatures are normal.
- – Shutdown and re-inspection: Tighten the liner and hammer bolts, and confirm there are no abnormalities.
III. Operating Procedures
-
Pre-startup Inspection (Mandatory)
- Lubrication: Ensure the bearing chambers are adequately filled with grease (calcium-based grease ZG-2) and that there are no leaks.
- Fastenings: Check that the hammer heads, liners, screen bars, and anchor bolts are secure.
- Chamber: No metal or large debris inside; hammer heads show no cracks, and wear is within normal limits.
- Drive System: V-belts are intact and properly tensioned; protective covers are complete and secure.
- Electrical System: Grounding is reliable; switches and buttons are in good condition; no personnel or obstacles in the vicinity.
-
Startup Procedure
- Confirm all checks are complete and issue the startup signal.
- Start the machine under no-load conditions and run for 1–2 minutes. Once no abnormal noises are detected, begin feeding material evenly (distribute material along the entire length of the rotor to prevent one-sided loading).
Operational Monitoring:
- – Current: Must not exceed the rated value; no sudden surges.
- – Temperature: Bearings ≤70°C; shut down immediately if overheating occurs.
- – Sound: No impact or abnormal noises; vibration within normal limits.
- – Particle size: Must meet specifications; clear any blockages promptly.
-
Shutdown Procedures
- Normal shutdown: Stop feeding first; wait until the material in the chamber is completely discharged before shutting down the machine and disconnecting the power supply.
- Emergency shutdown: In case of material blockage, abnormal noise, smoke, or electrical leakage, immediately pull the circuit breaker to cut off power, post a warning sign, and then investigate the issue.
-
Operational Adjustments
- – Output Particle Size: Adjust the gap between the screen bars or replace the screen bars; a smaller gap results in finer output and reduced output.
- – Feeding Control: Ensure feeding is uniform and continuous to prevent overloads and blockages; metal objects are strictly prohibited from entering the machine.
- – Hammer Balance: When replacing hammers, weigh and pair them; place the heavier ones in the center and the lighter ones on the sides, ensuring the weight difference is less than 0.5 kg.
IV. Maintenance
-
Daily Maintenance (Every Shift)
- – Cleaning: Remove dust and residual material from inside the machine and the machine body.
- – Inspection: Check for wear on hammer heads, liners, and grating bars; check for loose bolts; monitor bearing temperature; and check V-belt tension.
- – Record-keeping: Record current temperature, unusual noises, and wear conditions.
-
Periodic Maintenance
- – Weekly: Replenish bearing grease; tighten all bolts; inspect guards and V-belts.
- – Monthly: Inspect hammer heads and liners for wear; adjust or replace if severe; align pulley coaxiality.
- – Quarterly: Clean bearings and replace grease (clean with gasoline or kerosene; grease volume should fill 60% of the cavity); inspect main shaft and pin shaft for wear.
- – Annually: Perform a complete disassembly and overhaul of the machine; replace worn parts; service the motor and bearings; change the oil.
-
Lubrication Specifications
- – Bearing chambers: ZG-2 calcium-based grease; grease once per shift; clean and replace every 3 months.
- – Motor: Follow manufacturer’s specifications; check lubrication every 500 hours.
V. Safety Precautions
- Operators must be properly trained and certified; unqualified personnel are not permitted to operate the equipment. Operators must be familiar with the equipment’s structure, operating principles, and procedures.
- During operation: It is strictly prohibited to open doors, peer inside, or insert hands or tools into the chamber. Do not stand on the equipment or lean against the machine body.
- Maintenance/Cleaning: Shut down the machine, disconnect the power supply, post warning signs, and wait until the equipment has come to a complete stop before performing any work.
- Electrical Safety: Ensure reliable grounding and intact wiring; conduct additional insulation checks in humid environments.
- Material Jam Handling: Manually clear jams only after the machine has been shut down and power disconnected; under no circumstances should material be dislodged while the machine is running.
- Personal Protective Equipment: Wear a safety helmet, work clothes, a dust mask, and safety shoes.
VI. Troubleshooting
| Fault Symptoms | Reason | Troubleshooting |
| The output particle size is too large | Wear on the hammer heads, large gaps between the screen bars, and loose liners | Replace the hammer heads, reduce the clearance, and tighten the liners |
| Decline in production | Hammer head wear, screen bar clogging, insufficient feed | Replace the hammer head, clear blockages, and ensure even feeding |
| Excessive noise/vibration | Loose bolts, broken hammer heads, unbalanced rotors, material jams | Tighten the bolts, replace the hammer head, and balance the rotor. Clear the blockage. |
| Motor overload, high current | Material buildup, overfeeding, bearing seizure, low voltage | Clear blockages, reduce material, inspect bearings, check power supply |
| High bearing temperature | Insufficient lubrication, poor-quality lubricant, bearing wear, or excessive assembly tightness | Replace or replenish grease; replace bearings; reassemble |
| Material blockage | Material is too wet and sticky; feed rate is too high; screen bars are clogged | Shut down the machine to clear blockages, control material moisture content and particle size, and clean the screen bars |
VII. Supplementary Provisions
- This manual applies to standard hammer crushers; for special models, refer to the manufacturer’s specific instructions.
- During the warranty period, the equipment must not be modified or disassembled without the manufacturer’s permission; otherwise, the warranty will be void.
- Operators must strictly adhere to these procedures; any damage to the equipment or safety incidents resulting from non-compliance shall be the operator’s sole responsibility.
We offer customization for additional models to meet the diverse requirements of our customers. The price of the mining equipment will be determined by the manufacturer’s type, machine model, manufacturing process capacity, etc. You are welcome to consult JXSC‘s professional engineers to get a quotation based on your requirements. We can design a sand-making and crushing production line flow chart for you.
